Automatically Track Webform Signups with Zapier and Notion API Integration
Popular opinion: Zapier is the ‘fan favourite’ for automation. Notion is catching up on that. With more companies now using Notion, it’s great that Notion API is currently in public beta!
Notion is the all-in-one workspace for your notes, tasks, wikis, and databases. Zapier is an online automation tool that connects your apps and services to automate repetitive tasks without coding or relying on developers to build the integration.
I use Notion as the internal database for my startup, Maze, which you can check out HERE.
With the API, you can connect Zapier to Notion, automate actions within your workspace, and access integrations. P.S: you can integrate directly with Typeform. Simply:
API is the acronym for Application Programming Interface, which is a software intermediary that allows two applications to talk to each other.
Our focus for this post is tracking signups and lead generation from a web form with Notion and Zapier. So, I’ll assume you already have your email marketing software integrated and ready to push signup details to Notion. If not, I’ll write a tutorial on how I integrate Carrd and Sendinblue soon.
Let’s set this up.
Add and manage integrations with Notion API
We’ll start by creating a new integration with Notion API. We’re using Notion as the database.

First, navigate to the Settings & Members tab in your left sidebar on Notion. Note that only workspace admins are able to access the Settings & Members tab and create integrations:

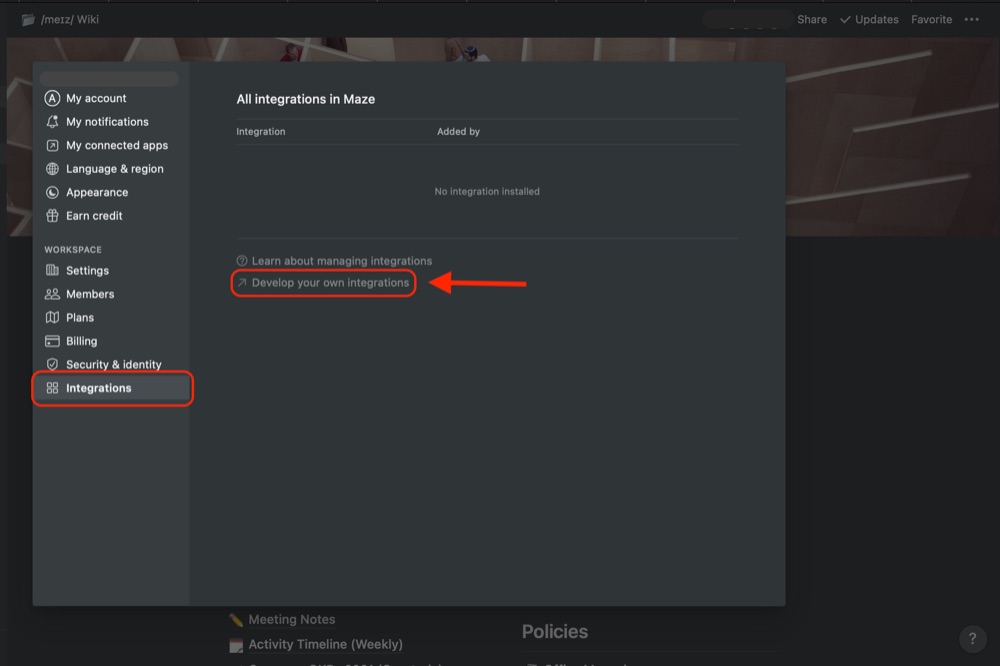
Next, we’ll add a new integration. Click on the Integrations tab in the left sidebar to reveal the Develop your own integration link at the bottom. Click this link:
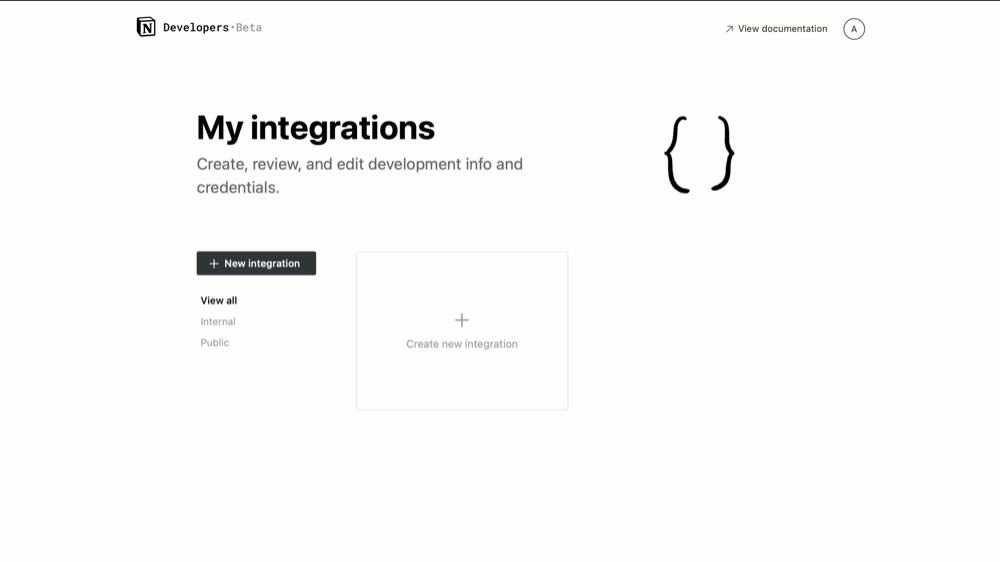
‘My integrations’ page will open in your browser. Click the + New integration button to create a new integration:
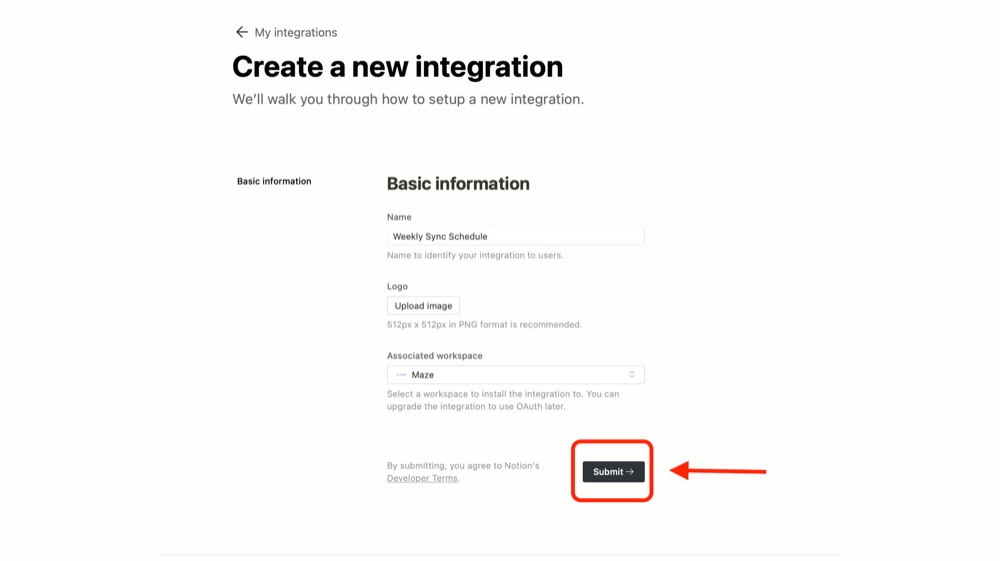
Provide a Name for your integration. You also have the opportunity to upload an image to use as a Logo. This is optional and can be skipped.
Your Associated workspace will appear in the dropdown menu. Select the workspace you would like to use this integration with.
Click Submit:
Next, select the integration type as Internal integration and click Save changes. You can show and copy your Internal Integration Token to your clipboard here:
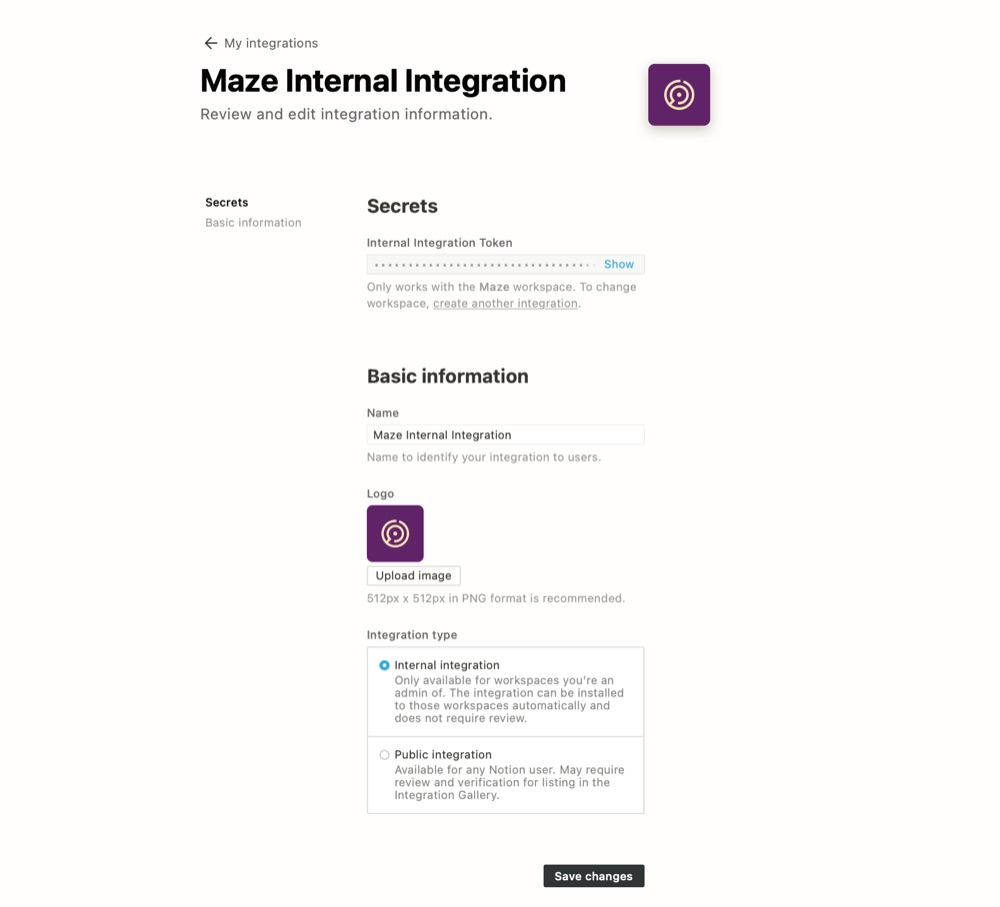
Click Save changes and exit to view your integrations.
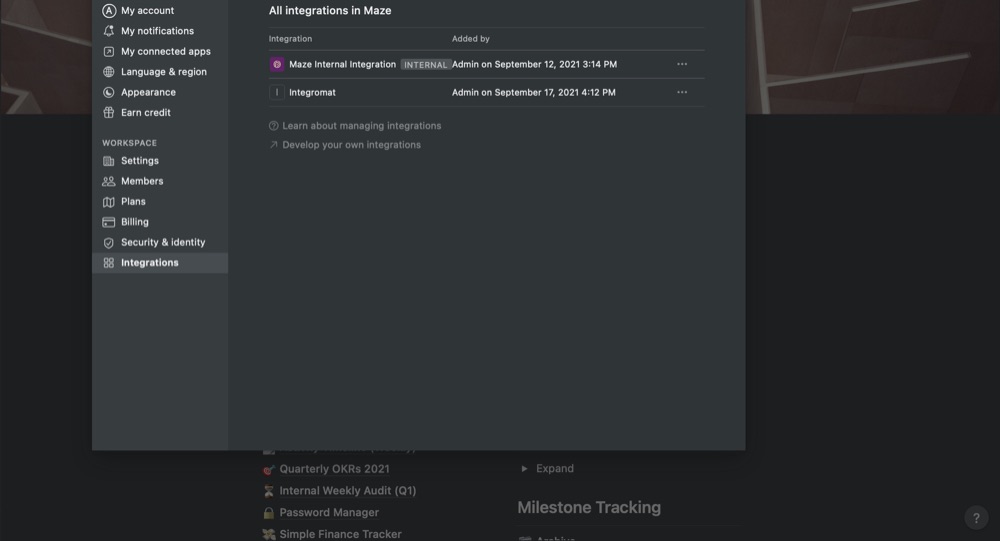
Once your internal integration is added successfully, you'll see this integration in the Settings & Members menu → Integrations. Here, you'll see all of the existing integrations installed for this workspace, the admin who added each integration, and the date each integration was added:
Retrieve internal integration token
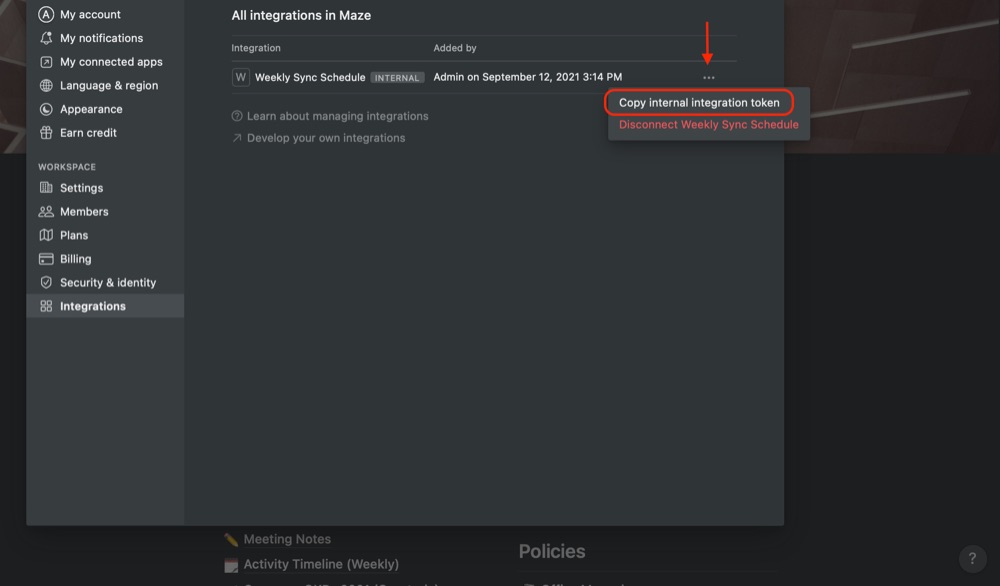
Click the ••• menu next to the internal integration that you'd like to link to Zapier to see additional options:
- Copy the API token for the internal integration. You'll need this token for any API-based automations or workflows or to link your workspace to Zapier.
- Disconnect the integration.
Click the Copy internal integration token (if you didn’t copy it in the previous step):
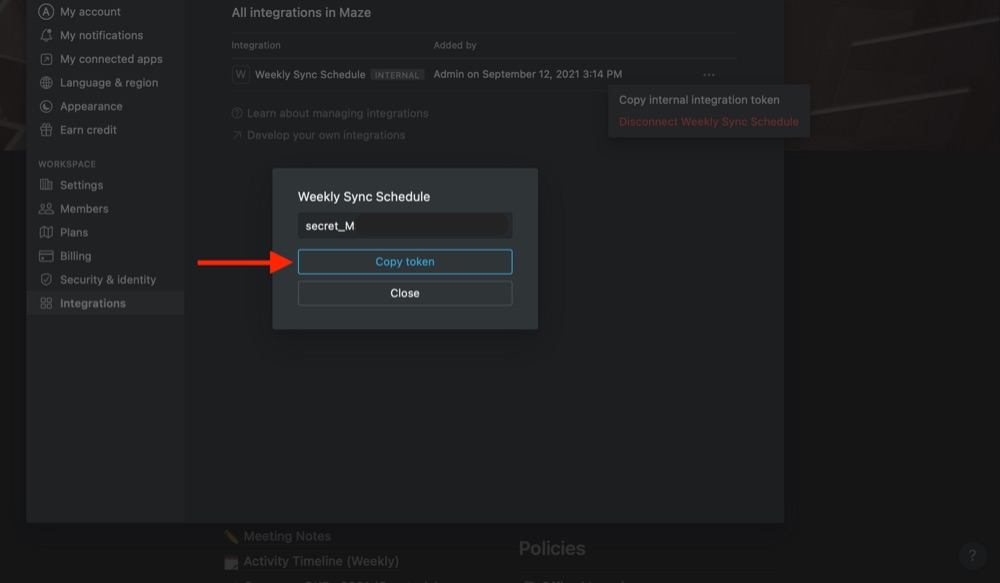
Your token is in this format secret… :
Add integrations to Notion pages
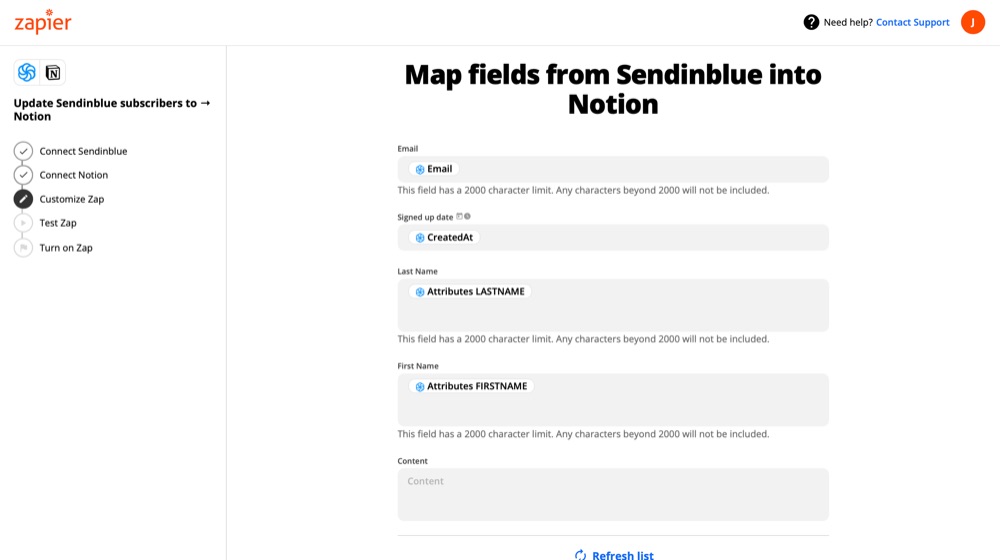
Next, we’ll set up the database to be populated. First, create a table on Notion with the following fields:
- First name
- Last name
- Signed up date
You can change these details depending on what information is pulled from your email marketing software.
We will add the integration to the specific page where it will be active. Integrations built with the API follow a similar permission system to the sharing permissions for Notion users.
In order to use an integration in your workspace, navigate to the page to be added and click the Share button on top right:

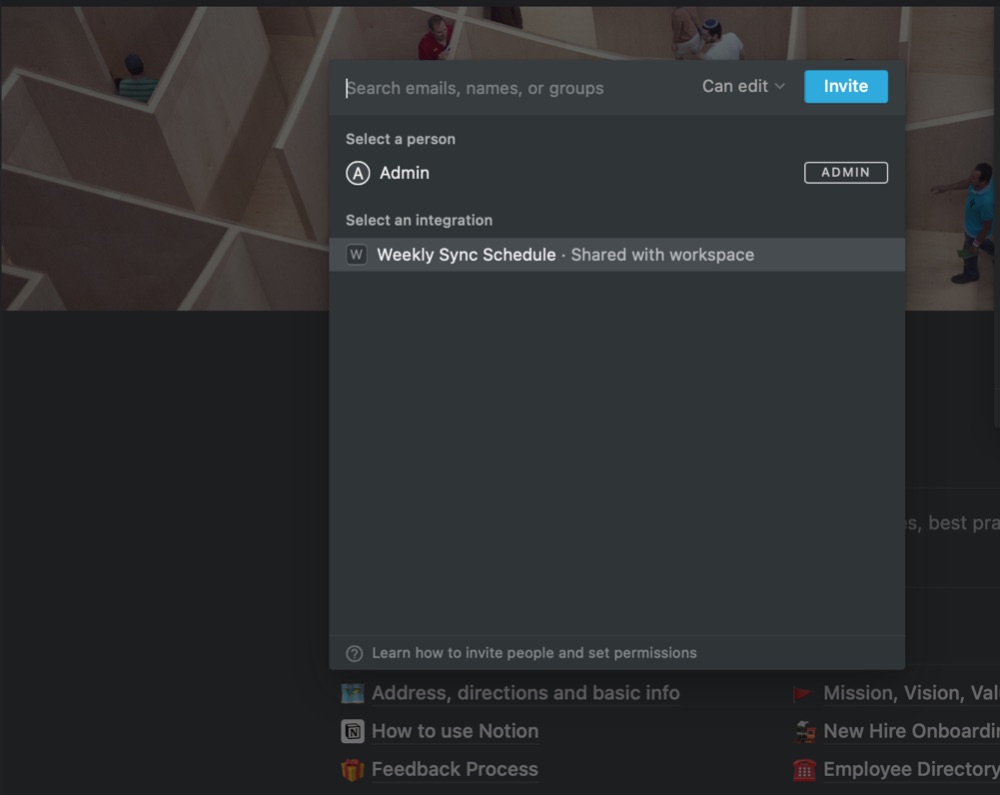
Click Add people, emails, groups, or integrations or invite.

In the resulting pop-up, select the integration you would like to add to this page. You'll only see integrations that have been created for and associated with this workspace. The integration will now appear in the Share menu for the page:
Install directly from a Zapier
Now that Notion is set up, Log into your Zapier account. Copy and paste this link to your browser to duplicate the workflow I created:
https://zapier.com/shared/adaea0ed981be8c32a1184307f9c2d42a4c18bc2
Click Try this Zap to duplicate:
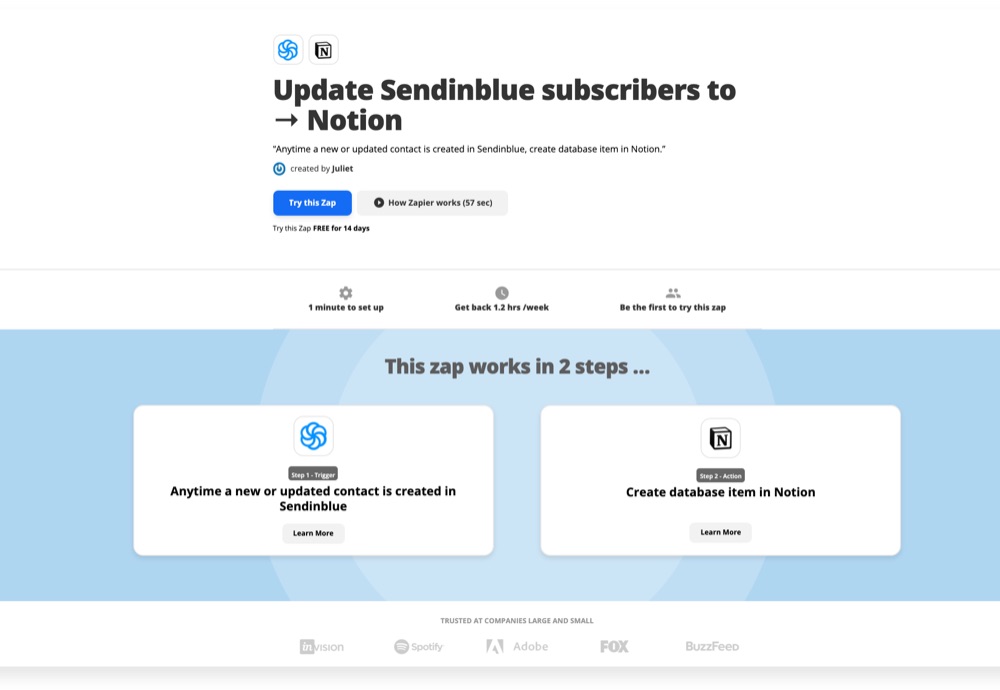
To start automating, you need to:
- Connect your accounts to Zapier to allow access your workspace
- Set up your Zap by choosing which data to send to Notion
- Turn on your Zap
Follow the steps set out in the workflow to
- Connect Sendinblue (or any email marketing software)
- Connect Notion. Zapier requires the internal integration token to link to your Notion workspace. Paste the internal integration token into the corresponding field on the set up form.
- Customize Zap
- Test Zap
- Turn on Zap
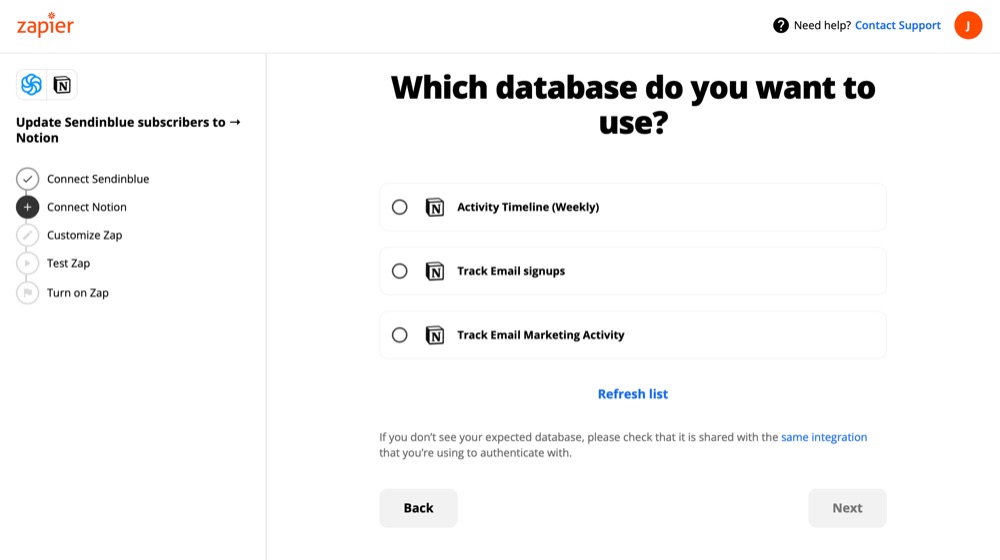
After you connect your Sendinblue and Notion accounts, Zapier will confirm which database you want to use. Click the workspace name to select, as integrations are workplace specific. If you don’t see your expected database, check that it is shared with the same integration that you’re using to authenticate with.
Then, press Next. You'll see a list of all of the pages in the selected workspace. Choose the pages you would like the integration to be able to access, and then press Next:
Next, map fields from Sendinblue into Notion. This will mirror the Notion table created earlier:
Click Next to test out this Zap. Zapier will create a Database Item in Notion to verify all works. If everything works fine, turn on Zap!
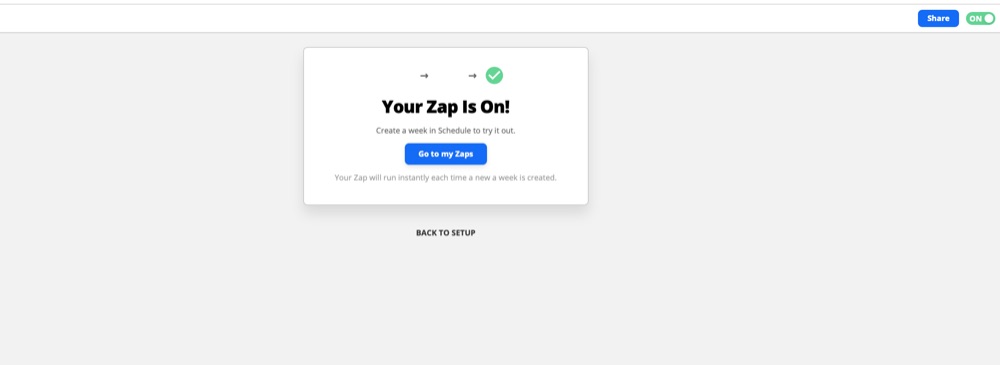
That’s it! Every time a new subscriber gets added, your Notion page is updated.
I’ll be writing more about adding and managing integrations with automation tools. Zapier is my go-to currently, however I use Integromat as well. Stay connected for more no-code tutorials, until next time.
ABOUT ME
I'm Juliet Edjere, a no-code expert focused on design, product development, and building scalable solutions with minimal coding knowledge.
I document all things product stories, MVP validation, and how designs, data, and market trends connect.
Visit my website → built with Carrd and designed in Figma
