How to Implement a Dynamic Search Function in your Bubble App
In this post, I’ll take you through how to implement a search function on your web or mobile app built with Bubble. Bubble is a no-code tool that lets you build SaaS platforms, marketplaces and CRMs without code.
Let’s get into it.
Install Plugin
First, you need to install the ZQ Fuzzy Search & Autocomplete plugin by Zeroqode. The plugin allows searching for not perfect matches accounting for typos and close matches. This allows for more flexible use compared to the native Bubble search options and operators to use when performing searches.
To install the plugin, visit the plugin page and select your app from the dropdown menu.
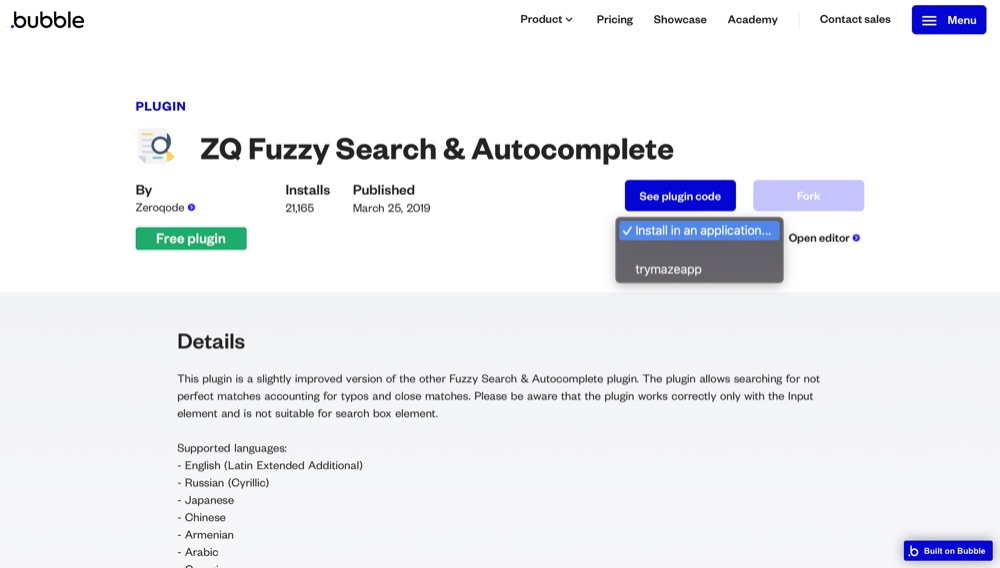
You can also install the app from the sidebar of the editor. Clicking the button will open the plugin marketplace, where you can browse, install and subscribe to plugins in the Bubble ecosystem.
Add a Search Icon
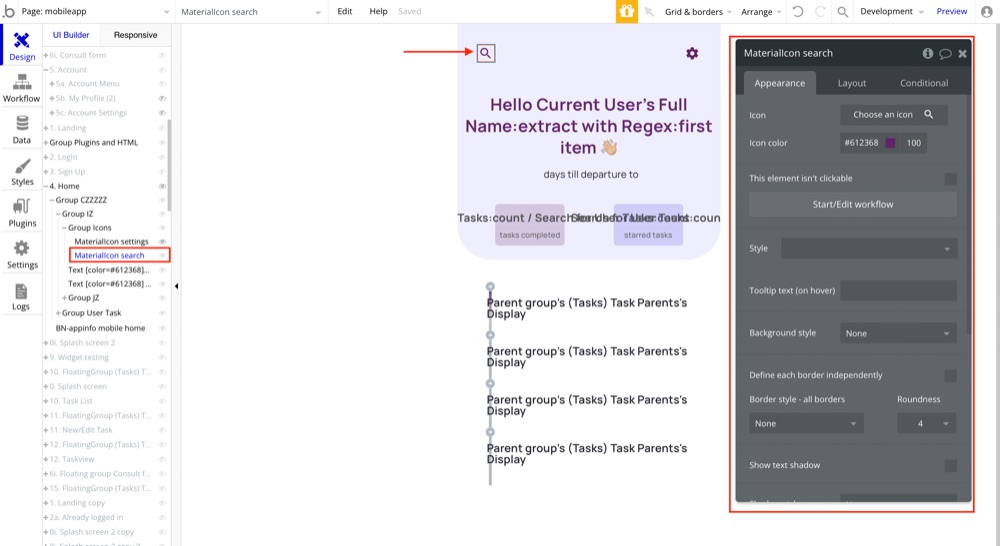
This is an optional step that only applies if you want the search input box to only show up when an element is clicked. To do this, add a material icon to the page you want the search to appear.
Add a popup element
This is a follow-up from the previous step. We want to create a pop-up for when the search icon is clicked. To do this, add the pop-up element to the page and add a group as you see in the image below.
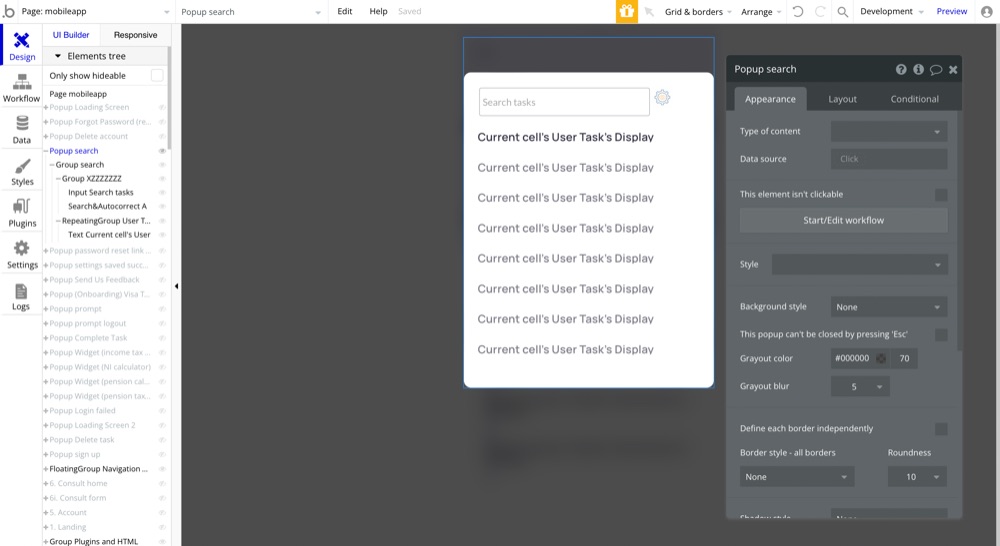
Within the main group, I’ve added two other groups - one for the search box and another for the repeating group, which will hold the search results.
Within the first group, add the:
- Input box from the ‘Input forms’ options in the sidebar
- Search plugin from the ‘Visual elements’ options in the sidebar
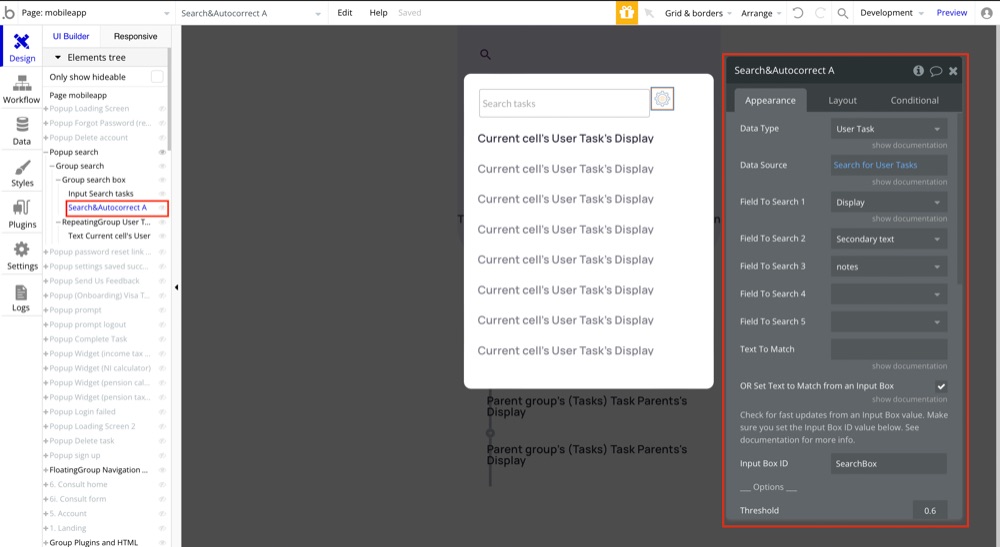
Set up the Search and Autocorrect plugin
Configure the
- Data type
- Data source
- Fields to search
- Check the ‘Set text to match from an Input box’ and Set an Input Box ID
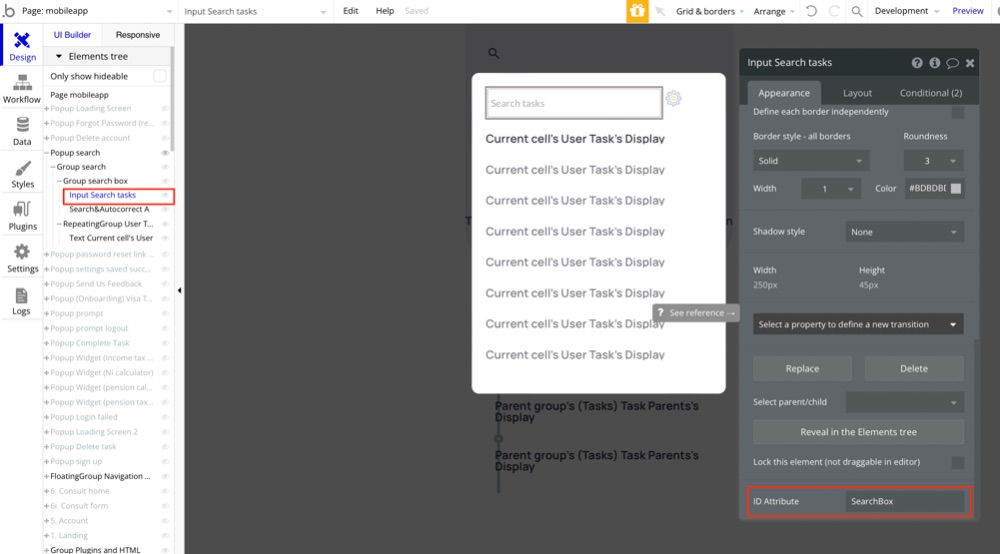
In the ‘Input Search tasks’ element, add the Input Box ID to the ID Attribute.
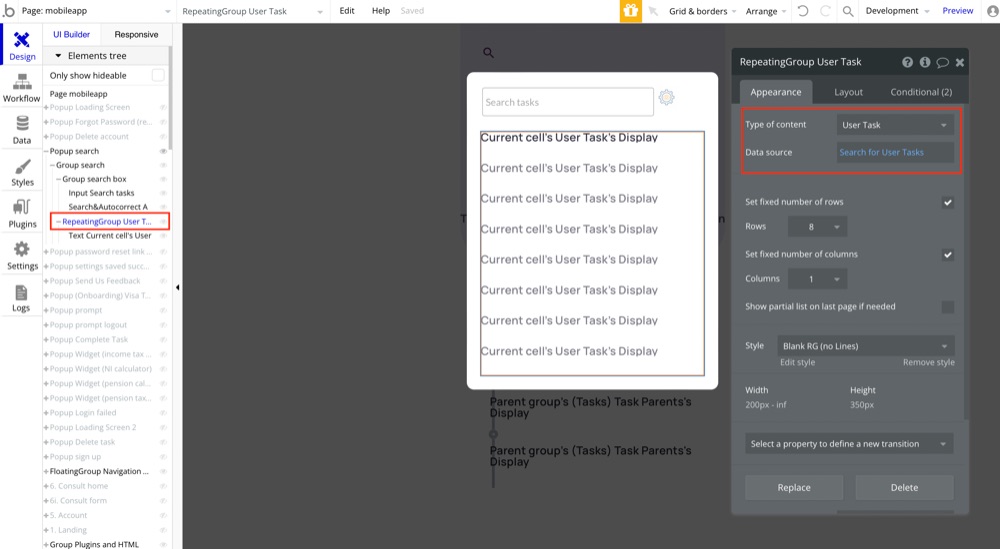
Set up Repeating Group
A repeating group displays lists of things, either coming from the application database or from APIs. Design the first cell, and the remaining cells will follow that design.
Configure the repeating group by choosing a type of content and the data source. This will tell Bubble where to limit the search results. In this case, I’ve used the ‘Search for User Tasks’ option and a constraint to limit the user tasks to ‘Current User’ only. The search results will only show the options specific to that user.
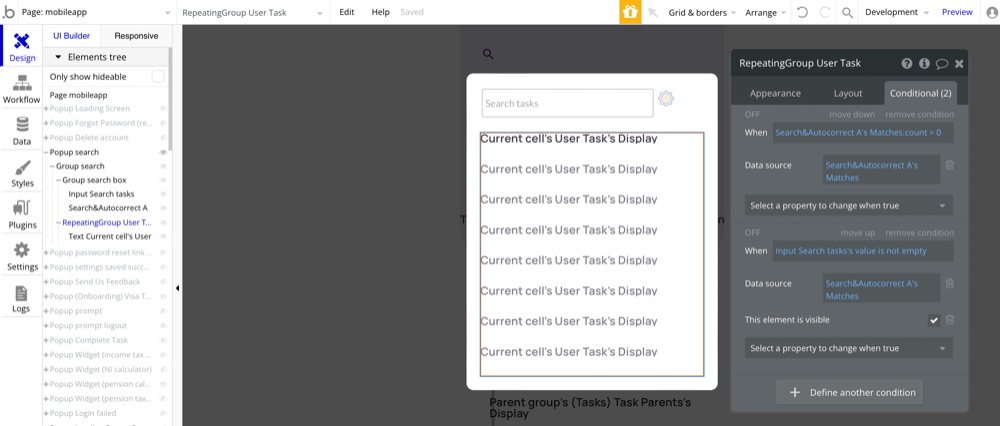
Next, switch to the Conditional tab. We want to set the data source to display results when Matches:count is > 0 and not empty. You can modify this based on your specific use case.
Within the repeating group, add a text element. If you have more than one text element to add, remember to nest the texts within a basic group. In the Appearance tab, set the dynamic text to show the user task display, or what you want to show. A text element displays static or dynamic text. It can also trigger a workflow with a click.
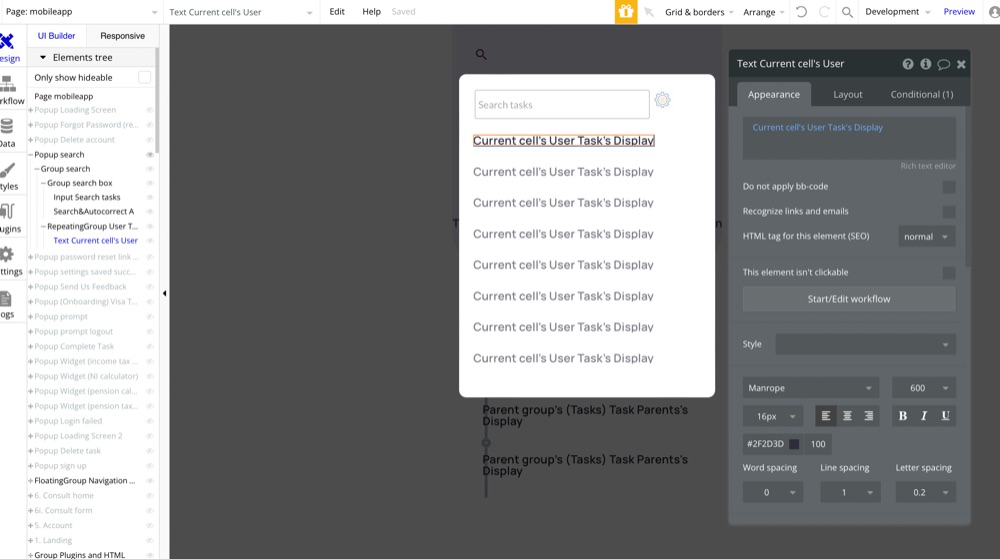
Set up a workflow for when the search text is clicked
Next, when the search results show up, we want to be able to click through the results.
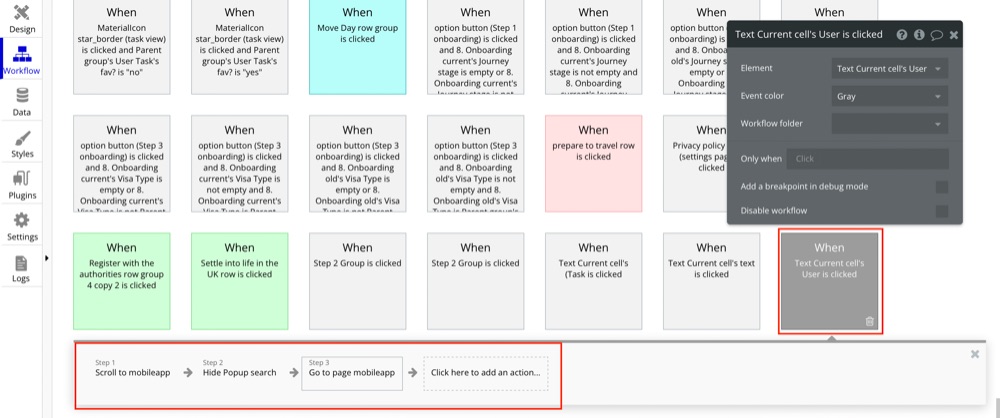
I recommend adding an action before the Go to page mobileapp action to Reset input Search&Autocorrect A.
Actions give life to the app. They save data, charge credit cards, sign the user up, send emails, connect to external services, show elements, etc.
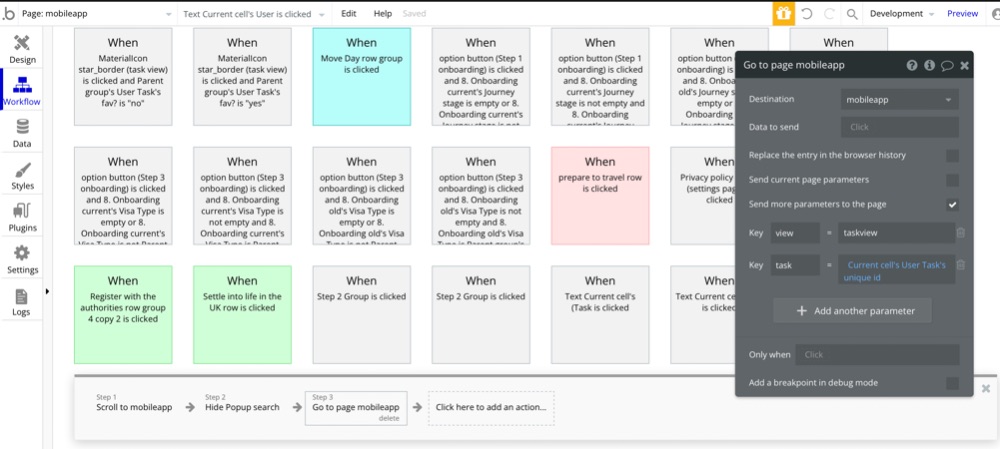
Next, define the key/values to send to the destination page. In the last step of the workflow, I’ve set the parameters to direct to taskview and tasks as the current cell’s user task’s unique id. This is so that the link clicked is dynamic.
Set up Search icon workflow
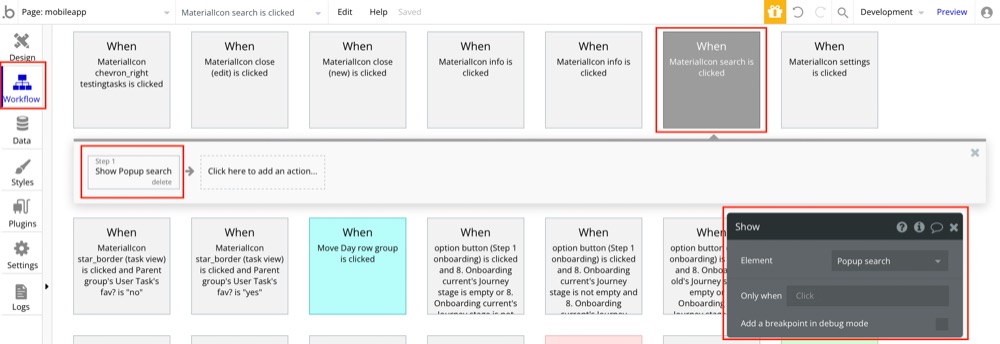
Next, Click on the Start/Edit workflow button to create a new workflow triggered by the search icon element. The type of event depends on the element and is generally the most common event. This button will create a 'When this element is clicked...' event. If a workflow already exists, this takes you to the existing workflow in the Workflow Tab. To create a different type of event or create a second event, go to the Workflow Tab and click the 'Click here to add an event...' button.
Conclusion
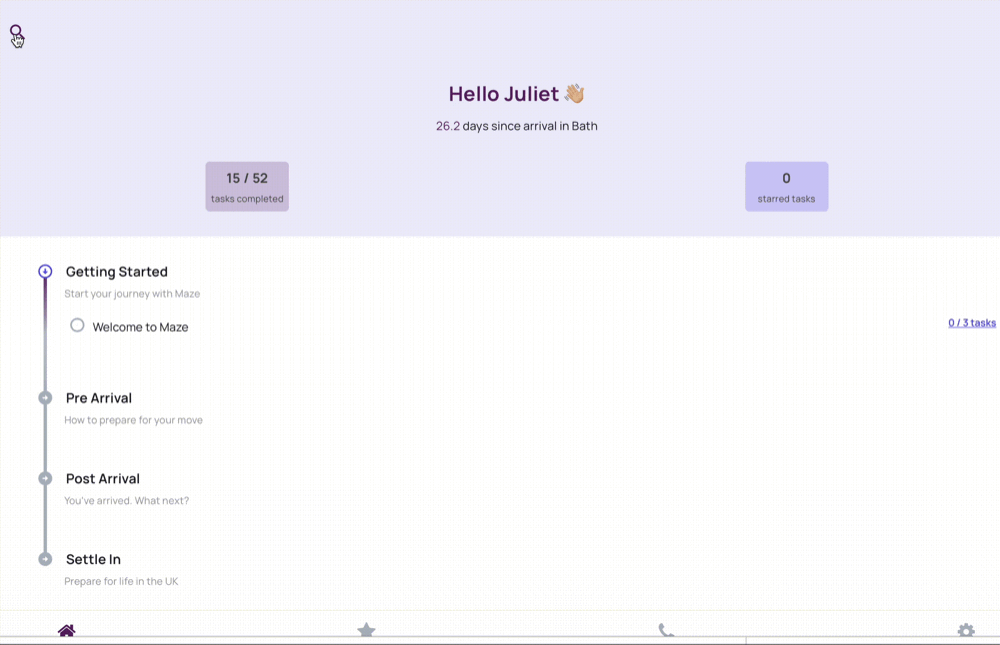
Here’s a quick demo of the live page from our app - trymaze.com.
Resources:
- Demo bubble page by Zeroqode
- Plugin page from Zeroqode
- About the plugin
ABOUT ME
I'm Juliet 'Hiri' Edjere, a no-code expert focused on design, business development, and building scalable solutions with minimal coding knowledge.
I document all things product stories, MVP validation, and how designs, data, and market trends connect to one another.
In our world where innovation knows no boundaries, and creativity reigns supreme, no-code is a game-changer in today's tech landscape. Whether you're a developer looking to expand your skill set or a beginner curious about creating without writing a single line of code, you will learn from practical examples, and explore the possibilities of no-code technology. Together, we'll navigate the tools, platforms, and strategies – one blog post at a time!


